Download the Source Files. Because the .psd files are to big for the Web I had to provide .jpg files for this tutorial.
The image was made for a Challenge called "Master and Servant" but unfortunately I did't read the rules so it had to contain a human part in order to be admitted for the challenge. But this is not a problem at all, at least i had something to do. The Idea behind is based on the cuckoo bird behaviour, who let his chick to be raised by other birds, just that in this case the one who is to be raise by a dove, that stays as a symbol for the soul, is a kind of zombie "Dragon" who's feed are souls and with each soul he get the more life came back in his bones.
The source images are taken with my Nikon D70, the turtle skeleton in a museum and the dove and the feeding house in a park. The rest of the used sources are made using the scanner and Photoshop.
This Tutorial was made on a PC, with Photoshop 7 but it can be done also with CS or Photoshop 6. If you are on a Mac use Cmd instead of Ctrl and Opt instead of Alt. For the shortcuts.
Step 1
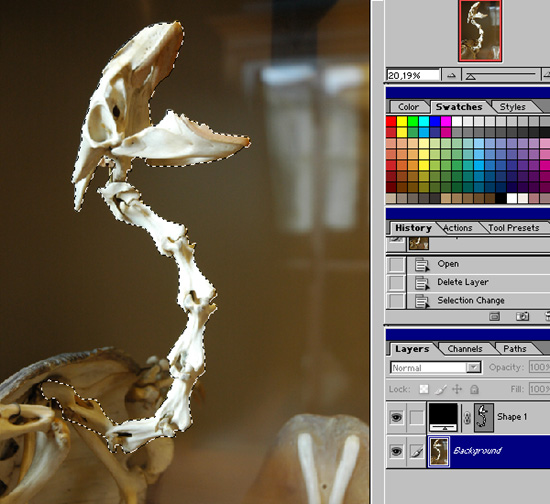
First we need to cut out the parts we need starting with the skeleton. Open the Skeleton.jpg from the source folder and using the Pen Tool (P) cut out the skeleton. To have a better view of what you are doing zoom in as much as you can and cut always inside the edge between the bones and the rest of the image. Once you have close the Path change from the Layer to the Path palette and Ctrl+click on the Shape a Vector Mask or activate fist the mask by clicking on and then click on the 3rd icon on the bottom of the pallete to Load path as a selection. After that change to the Channel palette and click on the second icon at the bottom of the palette to Save selection as a channel. Now back to the Layer palette with the selection still active click on the background layer and go Edit - Copy (Ctrl+C) and the save and close the source file.
Image 01
Step 2
Now go and create a new file(Ctrl+N). This are the setting i use for my image Preset Size -A3, Resolution 300 px/inch , Color Mode RGB. You have to chose a smaller Preset Size because the images i have provide for this tutorial are about the half of the original ones.
Once you have created your new file go Edit-Paste (Ctrl+V) to have the dove on a new layer.
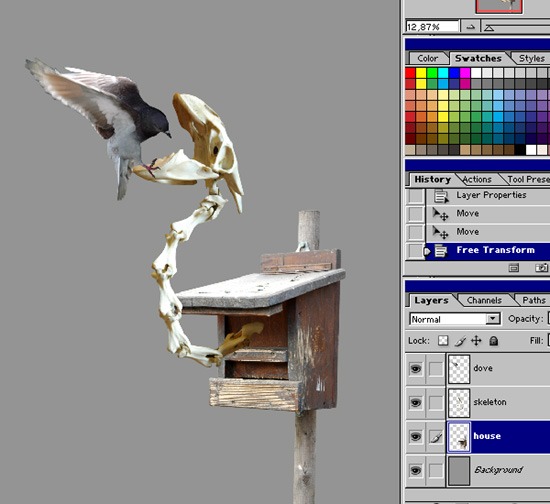
Name the Layer Dove and fill the background with a grey color so you can see better artefact on the edges ant to have a better control when you have to mage adjustments. Now cut out the house and the dove using the same technique as for the skeleton and also paste them in the new file. Name layers house and dove and try to arrange them like in the image 02.
Image 02
Step 3
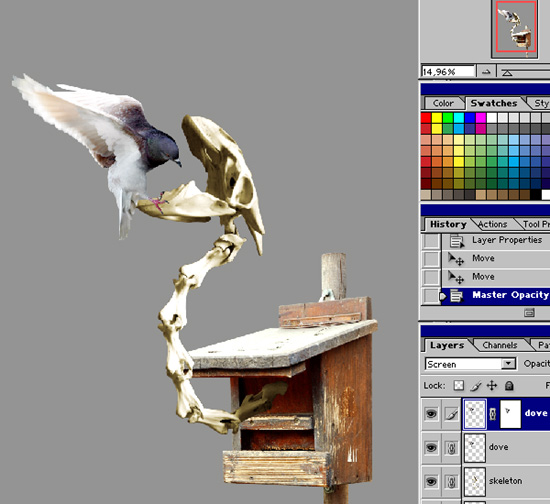
At this point we have to make some adjustments to bring the dove in the same light as the other parts of the image. Fist we will do some Level Adjustments, go Image-Adjustments-Levels (Ctrl+L) and drag the right and the left slider slightly to the right then the right slider slightly to the left and at the end the middle slide slightly to the left. This is a feeling matter just look at the image and you will know if you done to much and at this point the dove should still be a bit darker as the rest but we will take care about that next. Make a copy of the dove layer and Set the blending mode for the dovecopy layer to Screen and the Opacity to 90%. Now with the dovecopy layer still active click on the 2nd icon at the bottom of the palette to add a mast to the layer now use a soft round brush and black to cover up slightly parts of the dove that are not exposed as much to the light, like on the chest under the tail, inside the wings and so on. When you are done you should have something like in the image 03.
Image 03
Step 4
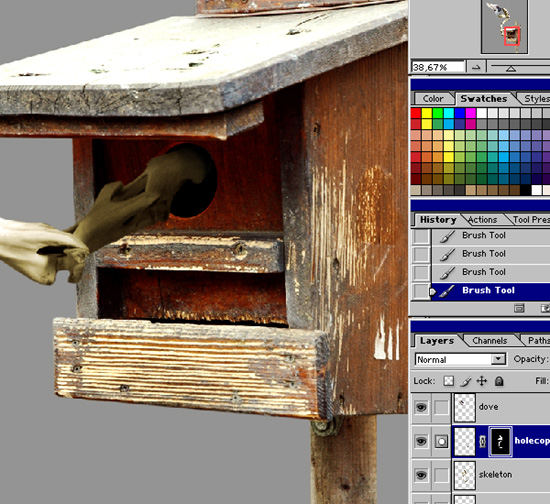
Now we have to make the whole in the haus where the skeleton came out. Zoom in as much you can to see the place where the skeleton meets the house the use the Eliptical Marque Tool (M) to drag an eliptical hole in the house. With the created selection active change to the haus house and hit Ctrl+C to copy and Ctrl+V to paste then name the new layer holelight and Set the Blending mode to Screen and the Opacity to 70%. Make a copy of the new layer and name it hole Ctrl+click on it to select and then hit G and fill the selection with black. After that go Edit-Transform-Distort and scale and distort the hole to fit inside the holelight in order to create the illusion of a hole in the house. Now the hole light and the hole layer should be above the haus layer and under the skeleton layer. Click on the hole layer and make a copy then drag the holecopy above the skeleton, after that Ctrl+click on the skeleton layer to select it, go back to the holecopy layer and click on the 2nd icon at the bottom of the layer palette to add a vector mask. Use a soft round brush with the Opacity set to 60% and black to cover out the parts of the skeleton that are covered by the holecopy layer in order tho create the illusion of a skeleton coming out of the hole. When you are ready you should have something like the image04.
Image 04
Step 5
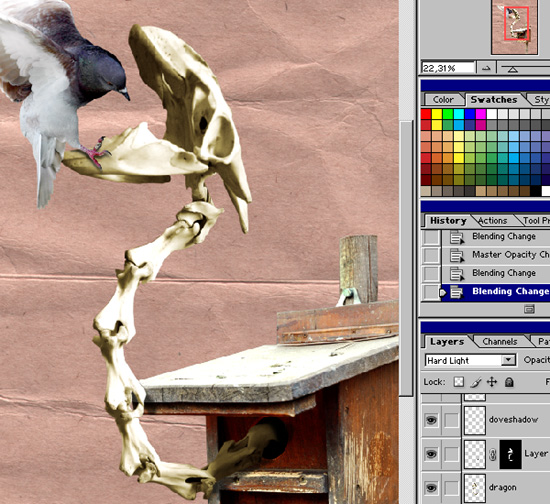
Now is time to add some shadows. Ctrl+click on the dove layer to select it and add a new layer under it name the layer doveshadow and fill the selection with a dark color. Now go Filter-Blur-Gaussian blur and blur the shadow with a radius of about 5px. After that Ctrl+click on the skeleton layer to load the selection then go Select-Inverse (Shift+Ctrl+I)
Click again on the dove shadow layer and hit Delete. Now Set the Blending mode to Multiply and the opacity to 75%. Use the same technique to add a skeleton shadow on the house. After that open the texture.jpg from the source folder and drag it into the image, name the layer texture and drag it over the background layer. The result should look like in the image05.
Image 05
Step 6
We do some adjustments again at this time. In order to make the parts looking a bit more crisp and fresh we use a blending mode. Select the haus layer and make a copy of it then Set the blending mode to Soft light and the Opacity to 70 % then merge the two haus layer together.
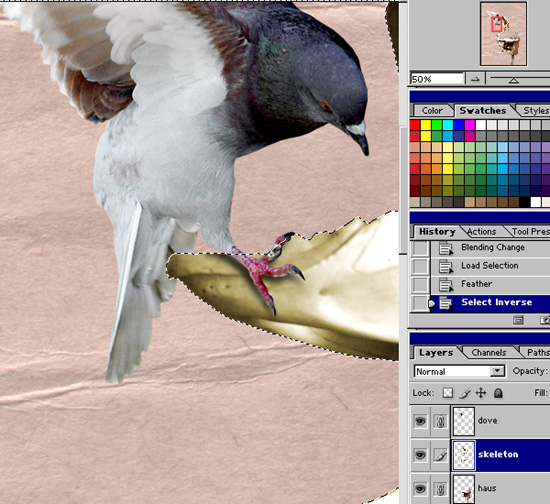
Do the same with the dove layer. And the same with the skeleton layer but for this one set the Opacity to 50%. Then with the layer still active go to Image-Adjustments-Hue/Saturation (Ctrl+U) and reduce the saturation to about -10. Then Ctrl+click to load the selection go Select-Feather (Alt+Ctrl+D) and set a radius of 1 and go Select-Inverse (Shift+Ctrl+I) then zoom in into the area where the dove sits on the skeleton and erase the part of the tail that covers the bottom part of the mouth like in the image06
Image 06
Step 7
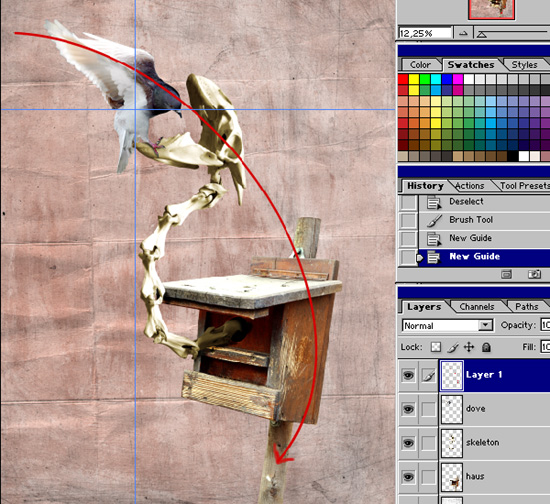
Now from the source folder open scratch.jpg and drag it in the image name the layer scratch and Set the blending mode to Multiply. Now open the paint.jpg from the source folder drag it in the image Set the blending mode to Soft light and name it paint. Drag the paint layer over the texture layer and the scratch layer over the paint layer. Now we will set the final composition Link the dove, skeleton and haus layers go to Edit-Transform-Rotate and rotate them a bit to the right. Now the elements create a nice curve from left-up to right down that helps to guide the viewers eyes on that path and to make from left up -life to right down- death and make the image understandable. It is time to save your file if you did't do it until now.
Image 07
Step 8
To have the composition complete in need a sky that fits in the image with a lighter upper-right side and a darker bottom-left side. I will paint one for that.
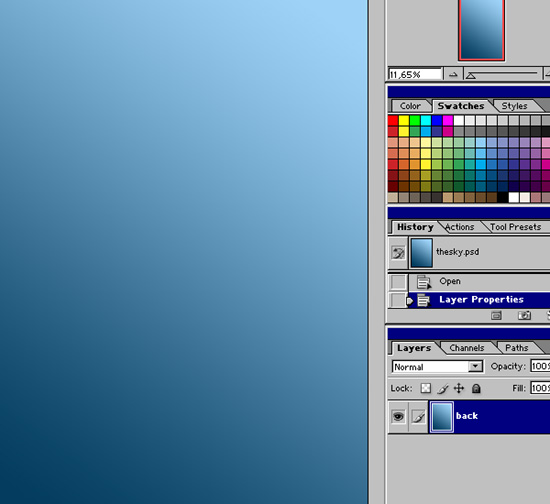
For that i made create a new file that has the same size and fill it with a blue linear gradient color
Image 08
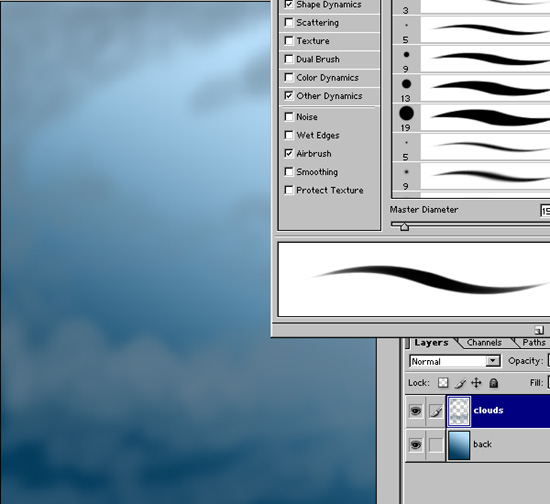
After that using a round soft brush with opacity set to 40% the shape and other dynamics checked i add some dark clouds all there where i want to have a dark image.
Image 09
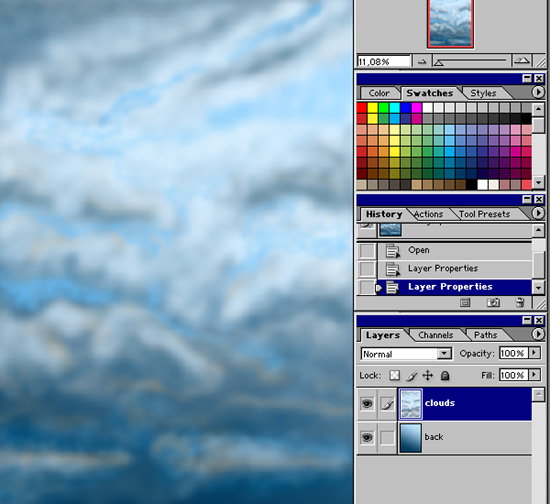
Once i had enough dark clouds i start to add some lighter one over them and also try to bring some orange color in there tho have the same color like in the other elements of the composition. This sky don't have to look really natural just to give the natural feeling of a sky and of light coming from the right direction so it don't matter if is to blurry or the cloud shapes are not to clear.
Image 10
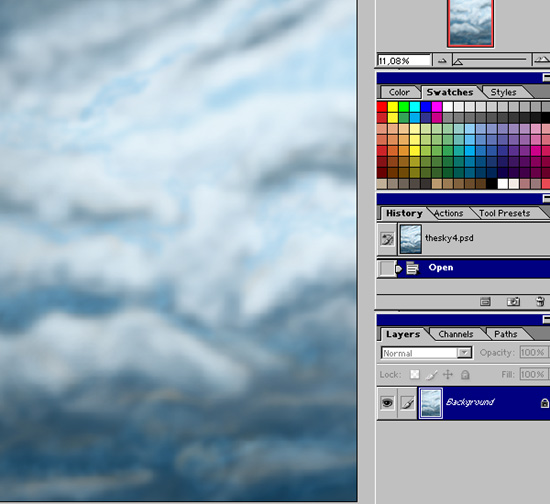
I keep working on the same way using the same brush just changing the size until i get a sky that I am satisfied with. You could try to paint you one one or you can use the one i made for the next step.
Image 11
Step 9
Open thesky.jpg from the source folder or use yours and drag it into the main image over the background layer name it sky. Select the texture layer above and set the blending mode to Soft light. Then select the scratch layer and do the same but also set the opacity to 65%.
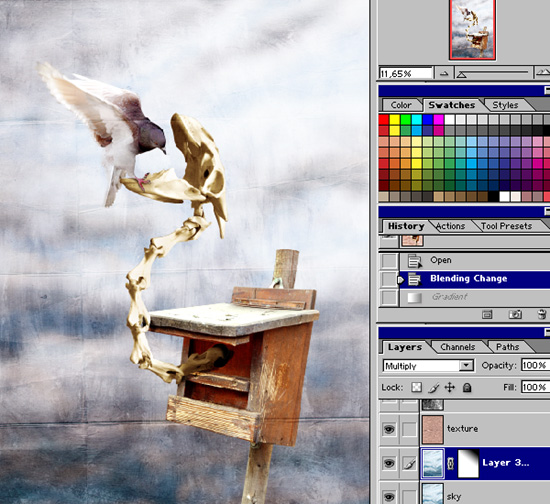
Go back to the texture layer and make a copy of it the drag the copy at the top above all other layer Set the blending mode to soft light and the opacity to 65%. Now make a copy of the sky layer and Set the blending mode to multiply then click on the 2nd icon at the bottom to add a layer mask to the skycopy layer. Select the gradient tool (G) and use a linear black and white gradient.
Select the mask and drag from up right to down left to cover up the light part of the sky copy layer like in the image 12.
Image 12
Step 10
Be sure that the dove, skeleton and haus layer are linked and then go Layer-Merge linked (Ctrl+E). Then hide the texture layer and the new dove layer and go Layer-Merge visible (Shit+Ctrl+E). Save this file under a new name. Now make a copy of the sky layer and go Image-Adjustment-Hue/Saturation (Ctrl+U) and check the colorize radio button and use the following settings Hue-49, Saturation-15. After that add a layer mask use the Gradient tool (G) with the same settings as before and and again drag from right up to left bottom in order to cover up the light part of the sky like in the image13
Image 13
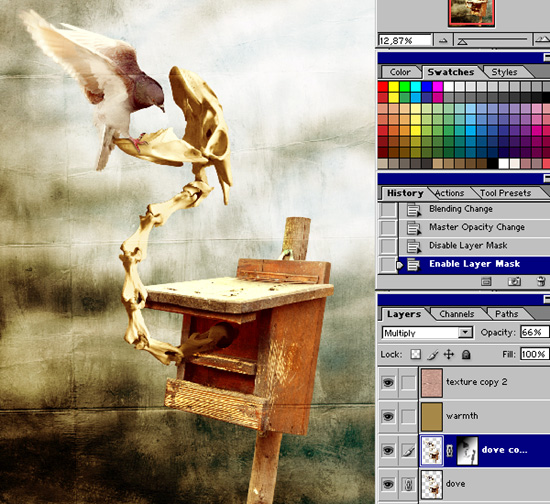
Click on the dove layer and then create a new layer name it warmth and fill it with this color # A68949, then Set the blending mode to soft light and the Opacity to 70%. Go back to the dove layer and make a copy then add a layer mask to the copy and Set the Blending mode to Multiply and the Opacity to 65%. Now use the Gradient tool (G) again but this time drag from the left up to down right. After that use a soft round brush with the Opacity set to 50% and with black to cover up the parts that are hit by light like in the image 14.
Image 14
Step 11
Link the two sky layers and the merge them together, do the same with the dove layers. Now Ctrl+click on the dove layer and go Select-Feather (Alt+Ctrl+D) an set a 2 px radius then go
Select-Inverse (Shift-Ctrl-I) and hit Delete one time. Now zoom in and look over the image to see if you still need to make some corrections where the edges are not clean, if everything is fine use the Blur tool (R) to blur slightly the edges of the feathers an the parts that are out of focus like the bottom of the house stick and so, then use the Burn (O) tool with the Opacity set to 50% to add shadows where is the need for like on the mouth of the skeleton under the dove or the chest of the dove and so on. When you are done Ctrl+click the dove layer once again and go to the Channel palette and click on the second icon at the bottom to Save the selection as a channel. Back to the layer palette create a new layer above the background layer
and go to the Gradient tool Select Radial and use the following colors # B7903A for the first and #B85F1C for the second then in the new layer drag fro m right up to left bottom.
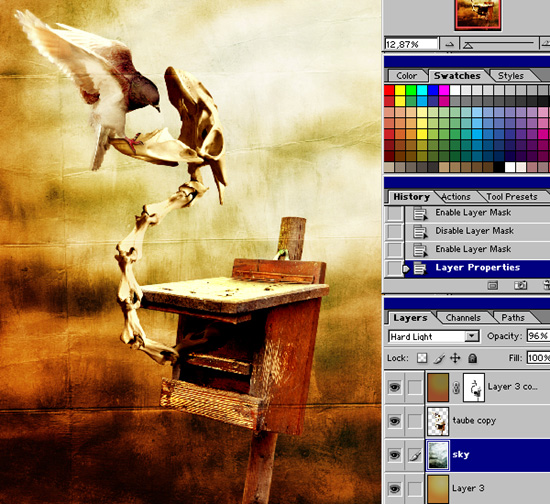
Select the sky layer above and Set the layer blending to Hard Light and the Opacity to 96%.
Now create a copy of the gradient layer and drag it over the dove layer, Set the blending mode to Soft light and add a layer mask. Now use a soft round brush and black to cover up the parts that are not on that light like the bottom of the house parts of the skeleton and the dove like in the image15
Image 15
Step 11
This is it, I have the look and the mood i want for my image now i will merge all the layer together and do some Adjustments. First i Desaturate a bit the color and then I go to Image -Adjustments-Color balance and add some yellow and reds to the highlights and some blue and cyan to the shadows. I work on the Adjustments until i am happy with the way the image looks.
And here is my final image.
Image 16
Copyright © 2011
Teodoru Badiu &
Apocryph.net. All rights reserved.
